Thinking of going on a road trip, but you don’t even know where to start planning? Read on!
Some travelers can just hop in their cars and set off with no real plan of exactly where they are going or what they will be doing. They just start driving and see where the road takes them.
We are not those people.
On the contrary, we like to plan. Well I, Mallory, like to plan and Courtney likes for things to be planned so it all works out. We have never left on a single trip without at least some semblance of an itinerary. If you prefer not to be tied down to an itinerary and love the freedom of just seeing what happens, this is probably not the post for you. If, however, you do lean more towards a (somewhat) scheduled trip then I have a few tips for you. Also note, this is more specific to a car road trip as opposed to, say, an RV trip. However, some aspects can be applied to both.
Now, first of all, I would like to say that I know not everyone gets as much joy out of planning as I do (the girl who made a schedule of events for her 10th birthday party much to the dismay of the other kids). A lot of people hate planning and only find it stressful, and I don’t expect to change minds completely by the end of this post. But what I do hope is that I’ve maybe made planning a road trip seem less daunting than before.
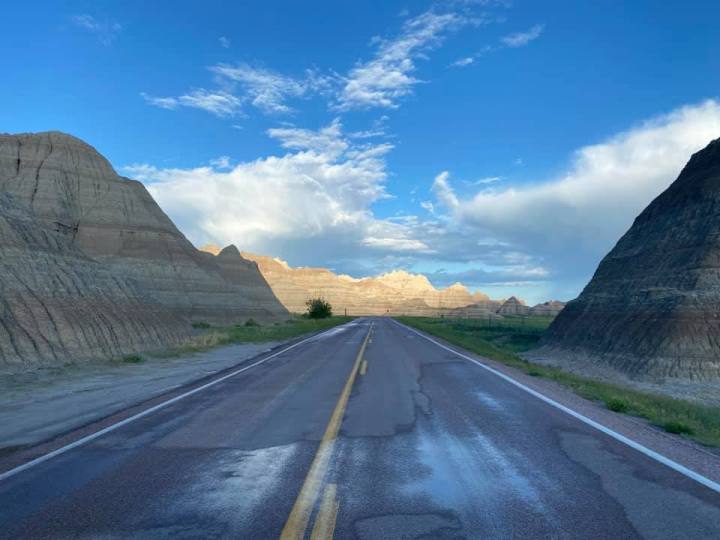
The examples I am going to use in this post are from the longest road trip we’ve taken thus far, a two week trip through South Dakota, Wyoming, and Montana. If you want to know the specific itinerary for this trip, check out the blog post here. A little about the trip: We stayed a total of 13 nights in 9 different hotels/Airbnbs across 4 states. We had two flights (with layovers) and one rental car. We went to 6 national parks, 5+ other parks/landmarks, and made several other stops along the way.
So how did we start planning this trip? And how can you start planning yours?
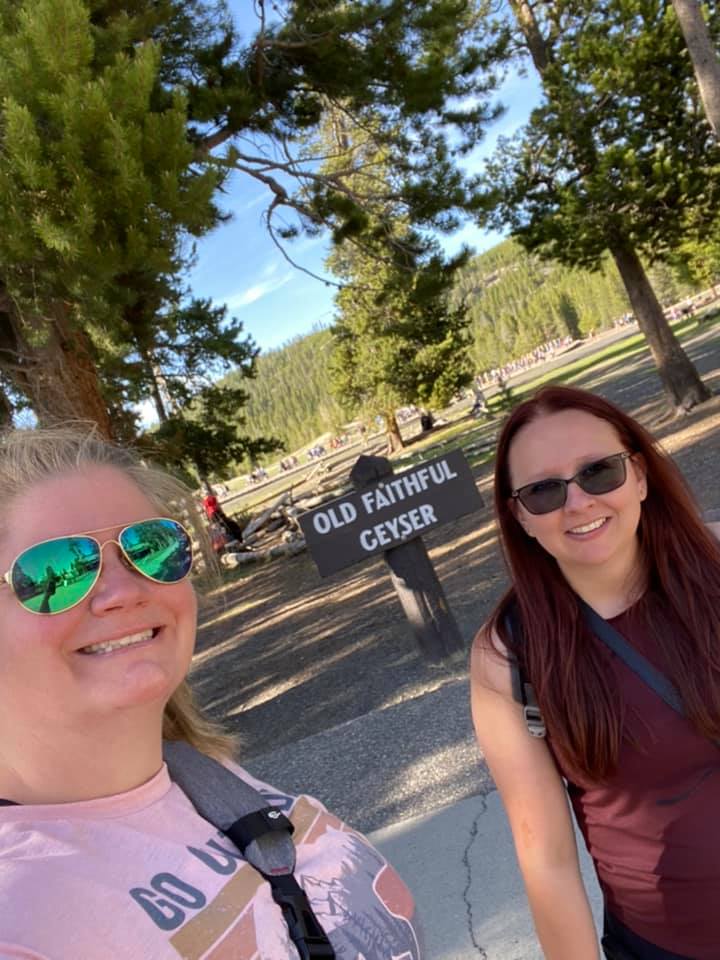
Step 1- Determine at least one place you want to go. You only really need one destination in mind to start the planning process. For us, we knew we wanted to visit Yellowstone so that was our starting point. From there, we were able to branch out and plan our other destinations. If you are thinking about taking a road trip, you likely already have at least one place in mind.
Step 2- Start thinking about a few important details. Knowing the answers to these questions will help the rest of the process go more smoothly. And even if you can’t answer them exactly, at least having a general idea is helpful.
-How long do you want your trip to be? One week, two weeks?
-When do you want to go? What time of year?
-What methods of transportation are you using? Are you driving your own car or renting one? Will you be flying?
-What is your max budget?
To help answer these questions fully, head on into step 3.
Step 3- Research time! Once you know at least one place you want to visit, and have figured out some of the logistics, expand your search. If you’re interested in national parks and monuments, for example, search the nearby states/areas for them. You may discover places you never knew you wanted to visit. For us, that included Badlands National Park, Custer State Park, and Glacier National Park. To help you with this step, my best advice is to Google it. You may stumble upon site specific websites or blogs to give you ideas. I found several blog posts about road trips through the Yellowstone area that really helped me plan my strategy. Websites like Trip Advisor are also helpful as you can sort by categories like “Top Things to Do” in insert location here. This is the biggest research step and can take days, weeks or even months to nail down. Don’t worry about figuring everything out right away. Give yourself time. This step also includes having discussions with your traveling companion(s), unless you’re doing it solo, to make sure they are on board with all of your ideas.
It’s also time to research costs. If you are flying or renting a car, you will need to factor that into your budget. When we first started looking for rental cars, the best price we could find for two weeks was over $8,000. Needless to say, we thought we were going to have to scrap the entire trip. After much searching (and stress) we found a solution. If car rental prices are giving you heart palpitations, here are a few things to keep in mind. If you leave your car in a different place than you picked it up, you will have to pay a drop fee. And, oftentimes, that fee will make up close to half of your bill. Also, picking up a car at the airport is always more expensive than picking it up at a standalone car rental place. To get our price down for this trip (because we knew we would have to pay the drop fee), we switched our pickup location to a random Enterprise in Sioux Falls as opposed to the airport. That dropped our price down to just under $1,800, which was much more manageable.
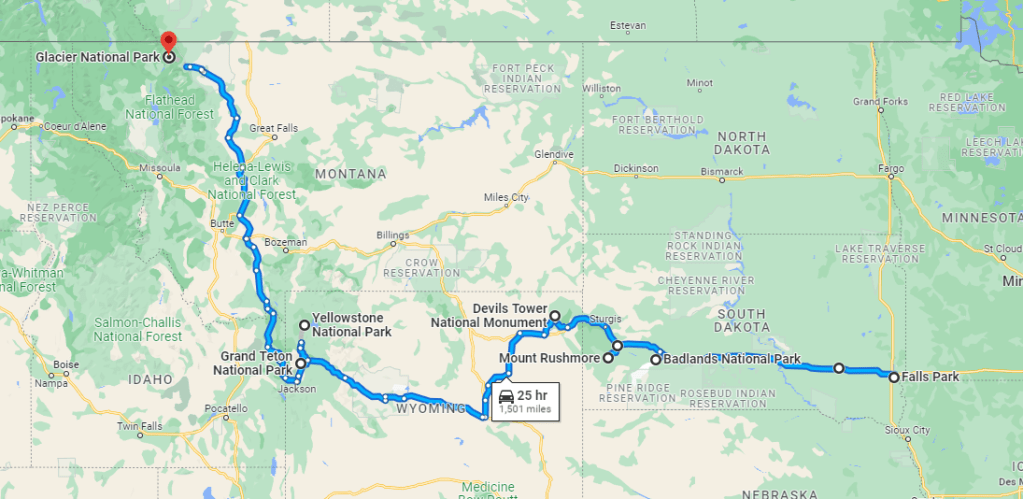
Step 4- Use Google Maps to plot your course. Once you’ve decided where all you might want to go on your road trip, start plotting locations on the map. This was extremally helpful in making our itinerary. We were able to plan the best course once we knew where each place was in relation to the others. This step can also assist you in determining travel time and mileage. Do you want to make a full circle and end at your starting point? Or go in a line like we did?
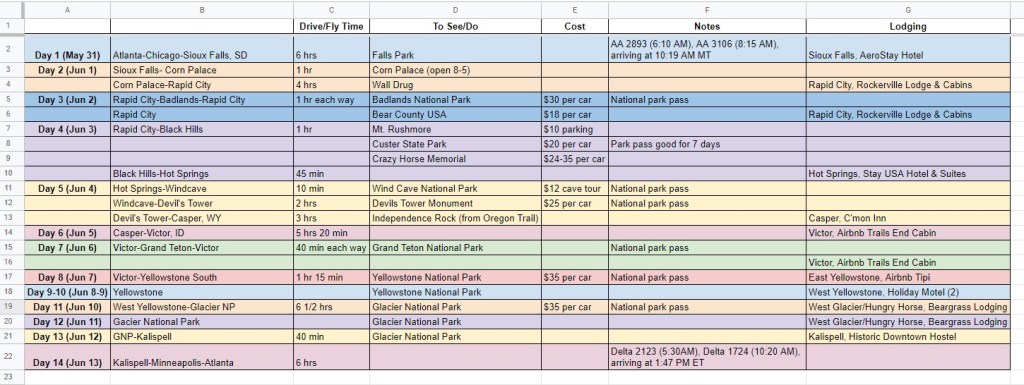
Step 5- Start working on a sample itinerary (or 5). For this one, I am going to recommend making a spreadsheet. Now, I am a bit extra when it comes to making spreadsheets and I fully own that. And though color coding and multiple columns are not strictly necessary, it is part of my process. (Don’t worry, you don’t have to get as specific as I did.)
I usually make a few different versions of the itinerary to give us options. For example, I made 8, 9, 10 and 14 day itineraries to help us decide for certain how long we wanted our trip to be (back in Step 2 we had decided on up to 2 weeks but not specifically how many days). I also made reverse itineraries to help decide which direction we wanted to travel in (we eventually decided on West and then North). And don’t fret, it isn’t difficult at all to make a spreadsheet like mine. I normally use Google Sheets so that I can easily share it with Courtney and anyone else who might be traveling with us. Just create a few columns to list out the important details like location, driving time and things to potentially do.
Feel free to revisit your itinerary as many times as you need to and make changes freely. I edited ours about 30 times before we booked anything. Also, you don’t have to plan out every second of every day. We actually ended up changing our schedule a little bit because we arrived in some locations quicker than we thought and were able to see more than initially planned. Plan but also be willing to be flexible when necessary. Things probably won’t always go exactly how you think they will. (We had a bit of car trouble that thankfully worked itself out, but you never know.)
If you’re interested in a blank copy of a sample itinerary, check out our free downloads page here.
Step 6- Once you have finalized your itinerary, it’s time to start booking. There are a couple of things that we always check off the list before we leave for any trip: we make sure we have booked all lodging and transportation. We do not like to leave these to chance, especially when visiting popular areas. For this particular trip, that meant booking flights, a rental car and 9 hotels/Airbnbs. It may seem intimidating to book 9 different accommodations for one trip, and you do have to double and triple check your dates, but it’s not as bad as you might think.
The first thing we did was look for unique places to stay. We searched Airbnb in all of the different areas to see what we could find. We were able to find two really cute places to stay, a cabin and a tipi, near Grand Teton and Yellowstone. We also found a really cool place inside Glacier that was completely booked, even six months in advance of our trip. Still kind of sad about it TBH. We considered staying in more Airbnbs, because they are often cheaper than hotels, but decided against it for one main reason: cancellation policies. Always make sure to check the cancellation policy before any booking, especially on a trip like this. We like to have the flexibility to change bookings if need be without having to pay fees (a tragic loss of $1,000 on an Airbnb we had to cancel once has made us wary). Some Airbnb listings will give you a decent cancellation period of 30 days ahead of time (full or partial refund) but often it is not completely without penalty. You will typically still have to pay the service fees.
For the rest of our stays, we used Hotels.com. I am quite partial to this site because I have been using it for many years, but there are also a plethora of other sites you can use to book hotels. If you are a rewards member at any chain of hotels, you may consider booking all of your stays with that same chain. You are more likely to get discounts that way. With Hotels.com, you get free night’s stay for every 10 stays. We lucked out on this trip because we were able to cash in on a free night by the time we reached Hot Springs. You can also almost always book with free cancellation until the day of or day before your stay and I’ve never been charged any fees to cancel or change a reservation.
The best way to start booking lodging is to go in order. I booked our hotel in Sioux Falls first and then went down the list, keeping up with bookings on my spreadsheet as I went to make sure I had all of my dates correct. Even if you don’t have a spreadsheet, making a list of dates on your phone or even a piece of paper will be helpful.
Now, people will tell you different things about how far in advance to book your flights. We haven’t really found one particular method to work far better than any other, so we usually just keep an eye on prices from the time we determine our trip dates to when we are definitely ready to book, which is typically at least 2 months out (or until flights seem to be filling up). We often book our lodging first because it is much easier to cancel or change with no penalties. There are a number of websites you can use to compare flights (we use Google Flights) and you can even get alerts when prices change on particular flights.
Once you have your flight booked, it’s time to start looking for a rental car (if you need one). You can compare prices between dealers on rentalcars.com.
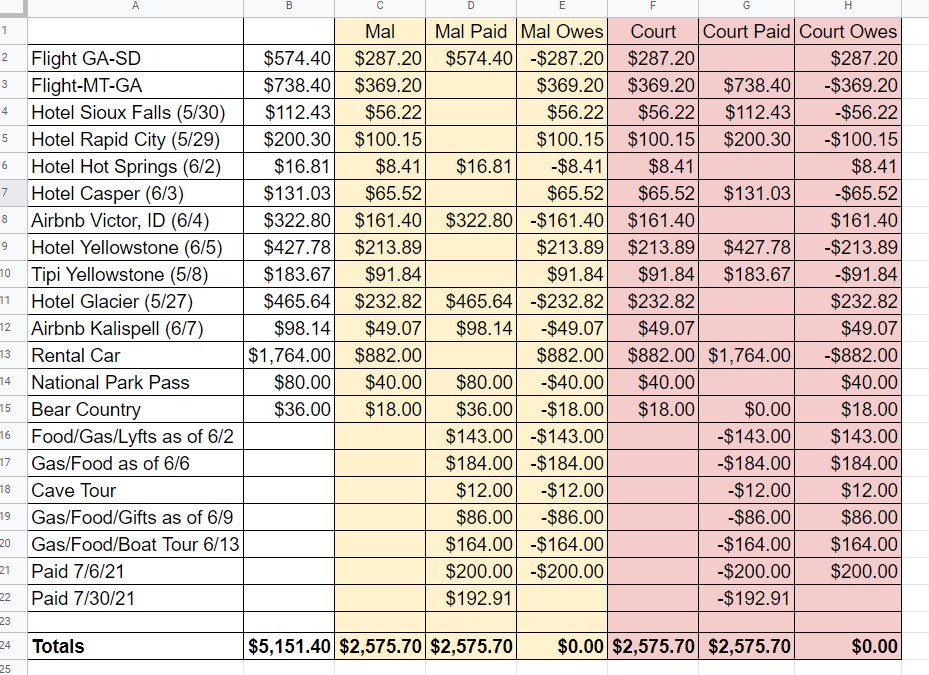
Step 7- Start keeping track of your expenses. Yes, I made another spreadsheet. Did you expect any less?
There are a multitude of apps out there now to help you keep track of travel expenses. In fact, I tried using SplitWise on a trip once. This app does offer some pretty cool features (more if you pay to upgrade) to help split checks and convert currency, but I just did not find myself using it for long. Instead, I always went back to my spreadsheet. This is obviously personal preference so I would recommend trying out different methods to see which works best for you. For more information on different kinds of travel expense apps, check out this blog from The Points Guy.
If you do want to use a spreadsheet, Google Sheets works well because it is totally free and you can get the app for your phone. As we start booking, I start adding expenses. Then, once we head off on the trip, I continue to add incurred shared expenses. If you are not sharing expenses with anyone, you may still want to keep track of how much you are spending in relation to your set budget.
And that’s pretty much it! My hope is that this blog was at least somewhat helpful for you in planning your next road trip. Try not to stress too much about your itinerary, and try different options. No one method will work for everyone. Happy planning!
